Wikibase Install Basic Tutorial
Below is a barebones version of the tutorial which provides commands you can copy and paste.
Step 1
Setting up server.
We are using Digitalocean.com for this tutorial. If you want to use it you need to setup an account: Digital Ocean
Create a new droplet with the green Create button
Select CoreOS from the container distribution tab:
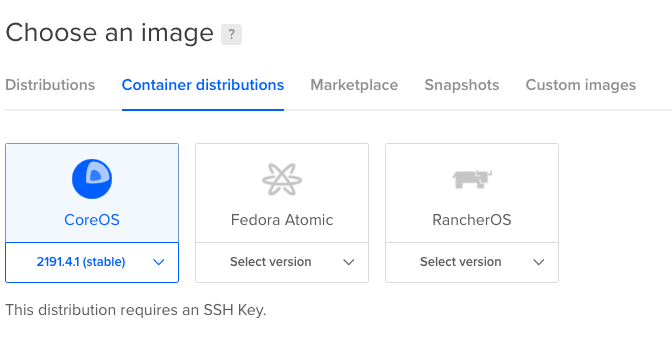
We are going to use the $20 a month 4 GB / 2 CPUs / 80 GB SSD disk / 4 TB transfer server Pick a region near you, I’m using NYC 3
We need to attach an SSH key to be able to log into the server. If you don’t have one click New SSH Key button and follow the directions, I show how to do it on OSX in the video.
Once the blue bar fills up and the server is online click the ipv4 label to copy the IP address to the clipboard.
SSH to host - In Terminal or Windows SSH or Putty we are going to SSH to the host. For me on OSX I open Terminal and run:
ssh -i /Users/thisismattmiller/.ssh/wikibase core@167.99.125.251
I am saying use this SSH key and use the username “core” to log into my server’s IP address
It might prompt you to accept and then you should see:
Container Linux by CoreOS stable (2191.4.1)
Step 2
git clone the repos and install docker-compose and run
Once we are logged in we want to clone two repositories so we try:
git clone https://github.com/wmde/wikibase-docker.git
cd wikibase-docker
git clone https://github.com/SemanticLab/wikibase-basic-local.git
This clones the two repos we need, the wikibase docker images and my repo of support files.
We need to install docker-compose so we run:
chmod +x wikibase-basic-local/install_compose.sh
sudo ./wikibase-basic-local/install_compose.sh
This makes the install script executable and then we run it as root, it install docker-compose
Now we just run:
docker-compose up
This will download the docker images and start them running, will take a few min.
Step 3
Test and gather some data
Once things stop scrolling and it says something like:
wdqs-updater_1     | 17:28:25.748 [main] INFO  o.w.q.r.t.change.RecentChangesPoller - Got no real changes
wdqs-updater_1     | 17:28:25.748 [main] INFO  org.wikidata.query.rdf.tool.Updater - Sleeping for 10 secs
Your wikibase should be running at:
http://<YOUR-IP>:8181
So for mine it was http://167.99.125.251:8181
The services run on different ports
http://<YOUR-IP>:8181 - Main Wikibase
http://<YOUR-IP>:8282 - Query service
http://<YOUR-IP>:9191 - Quickstatements
The first thing we need to do it create some data because I’ve found things stop working if you restart the service after it has initialized but has no data (seems like it breaks wdqs-updater)
Click on special pages on the left and create a property and an item:
We also need to make an OAuth key to use with Quickstatments: Make sure you are Logged In Click Special pages OAuth consumer registration Request a token for a new consumer.
Fill out the form, important values: OAuth “callback” URL: “http://<YOUR-IP>:9191/api.php” Allow consumer to specify a callback in requests and use “callback” URL above as a required prefix. : Yes Rights: High-volume editing, Edit existing pages, Edit protected pages, Create, edit, and move pages
Make sure you copy the key and secret, looks like this: You have been assigned a consumer token of 978b1226ab40cd643c5a9041039b85c1 and a secret token of 6186cbbfa24d13bf4df68713a7ada045a6adb4e1. Please record these for future reference.
Now we need to approve the key, click:
Special pages -> Manage OAuth consumers -> Queue of proposed consumer requests [1] -> review/manage And then “Update consumer status”
Step 4
Configure images
Now that we have the info we need we can shut down the docker server in the terminal pressing Control+C and it should shut down gracefully.
We want to do three things Disable public account creation and public editing Change the logo Add our OAuth key and secret to the Quickstatements image so it can work Update our IP address in the config so Quickstatements can work
We are going to edit the docker-compose.yml file using the editor vi
vi docker-compose.yml
We press the letter “i” to start insert mode, if you ever mess up and want to start over hit [esc] (escape key) and press colon “:” and enter “q!” (quit without saving)
Edit the volumes for wikibase. Before:
    volumes:
      - mediawiki-images-data:/var/www/html/images
      - quickstatements-data:/quickstatements/data
After:
    volumes:
      - mediawiki-images-data:/var/www/html/images
      - quickstatements-data:/quickstatements/data
      - ./wikibase-basic-local/LocalSettings.php:/var/www/html/LocalSettings.php
      - ./wikibase-basic-local/custom.png:/var/www/html/resources/assets/wiki.png
Edit the IP address in environment for wikibase. Before:
- QS_PUBLIC_SCHEME_HOST_AND_PORT=http://localhost:9191
After:
- QS_PUBLIC_SCHEME_HOST_AND_PORT=http://167.99.125.251:9191
Edit the volumes for quickstatements. Before:
    volumes:
     - quickstatements-data:/quickstatements/data
After:
    volumes:
     - quickstatements-data:/quickstatements/data
     - ./wikibase-basic-local/qs-oauth.json:/quickstatements/data/qs-oauth.json
Edit the environment for quickstatements. Before:
    environment:
      - QS_PUBLIC_SCHEME_HOST_AND_PORT=http://localhost:9191
      - WB_PUBLIC_SCHEME_HOST_AND_PORT=http://localhost:8181
      - WIKIBASE_SCHEME_AND_HOST=http://wikibase.svc
      - WB_PROPERTY_NAMESPACE=122
      - "WB_PROPERTY_PREFIX=Property:"
      - WB_ITEM_NAMESPACE=120
      - "WB_ITEM_PREFIX=Item:"
After:
    environment:
      - QS_PUBLIC_SCHEME_HOST_AND_PORT=http://167.99.125.251:9191
      - WB_PUBLIC_SCHEME_HOST_AND_PORT=http://167.99.125.251:8181
      - WIKIBASE_SCHEME_AND_HOST=http://wikibase.svc
      - WB_PROPERTY_NAMESPACE=122
      - "WB_PROPERTY_PREFIX=Property:"
      - WB_ITEM_NAMESPACE=120
      - "WB_ITEM_PREFIX=Item:"
      - OAUTH_CONSUMER_KEY=978b1226ab40cd643c5a9041039b85c1
      - OAUTH_CONSUMER_SECRET=6186cbbfa24d13bf4df68713a7ada045a6adb4e1
Okay. hit [esc] and enter “:” and enter “w” and hit enter. Then [esc] “:” and “q” and enter.
We also need to add the OAuth to a json file that the quick statements image reads:
vi wikibase-basic-local/qs-oauth.json
Before:
{
  "key":"KEYHERE",
  "secret" : "SECRETHERE"
}
After:
{
  "key":"978b1226ab40cd643c5a9041039b85c1",
  "secret" : "6186cbbfa24d13bf4df68713a7ada045a6adb4e1"
}
These are my keys, you need to use the ones you got from the process earlier.
Save and exit
Step 5
Testing everything works
Start up the system again:
docker-compose up
Once running go to your main site port 8181 and hard refresh and you should see update Logo. Lets connect Quickstatments to the wikibase goto: http://<YOUR-IP>:9191 So port 9191 Click Log In It should direct you to wikibase port and ask you to approve the Oauth link, you click yes And now quick statements should work

If you are going to keep the server around and you want to make this wikibase running a service that will startup if the computer reboots and runs in the background. You probably also want to setup some swap space to the server.
Control+C to wait for gracefully server shutdown I have two scripts that does this for you we just need to make them executable and run them:
cd wikibase-basic-local/
chmod +x create_swap.sh
sudo ./create_swap.sh
chmod +x make_service.sh
sudo ./make_service.sh
And that’s it, Wikbase should be running in the background now and will startup if the server reboots.
If you are done you can “destroy” your digitalocean droplet when you are completely done, this will distory the server (and your wikibase instance and data) otherwise it will keep charging you for your server.